Sourdough Loaf (and Recipe Planner)
This recipe is my transcription and adaptation of A Non-Baker’s Guide To Making Sourdough Bread, written in a style loosely inspired by literate programming. A bit more background on what this “literate recipe” thing is at my focaccia recipe.
This recipe is intended as a terse reference for those already familiar with the recipe, or sourdough breads in general. If you aren’t very experienced, you can watch the full video recipe linked above (also great as a visual reference), follow Tartine’s Country Bread recipe, and/or check out my advice on maintaining a starter.
Onto the recipe!
part 1
(5 minutes total)
5 minutes of work
Feed your starter with
- 100 grams lukewarm water
- 100 grams bread or all-purpose flour1
Let it grow several hours or overnight until it peaks.
flexible wait
(4-12 hours)
part 2
(6 hours total)
10 minutes of work
In a large bowl, add
- 400 grams water
- 200 grams starter2
and mix until dissolved. Then add
- 600 grams bread or all-purpose flour
being sure to get out most of the lumps.
Rest, covered, for 30 minutes.
30 minutes later
15 minutes of work
Add
- 12 grams salt
- splash of water
and mix.
Scoop dough out onto hard, non-porous, unfloured surface.3 Knead: grab, pull, smash, roll, turn (reference: original video at 3:20). Don’t pull too hard. Doing so tears the outer layers of the dough and makes the whole thing a sticky mess again. Repeat for about 10 minutes. You want dough that is smooth, elastic and tacky (but not sticky).
Return to bowl, cover, and proof for 4 hours in a warm environment.
4 hours later
5 minutes of work
Put dough on unfloured countertop. Sprinkle with flour, and flip. Fold each of the four edges over the center until you get a rough ball.
Rest, covered with the bowl or kitchen towel, for 30 minutes.
30 minutes later
10 minutes of work
Sprinkle with flour and flip. Fold all four edges to their opposite sides. Shape into a ball, then with the dough scraper, firmly push the dough in all directions to roll across the surface and build tension.
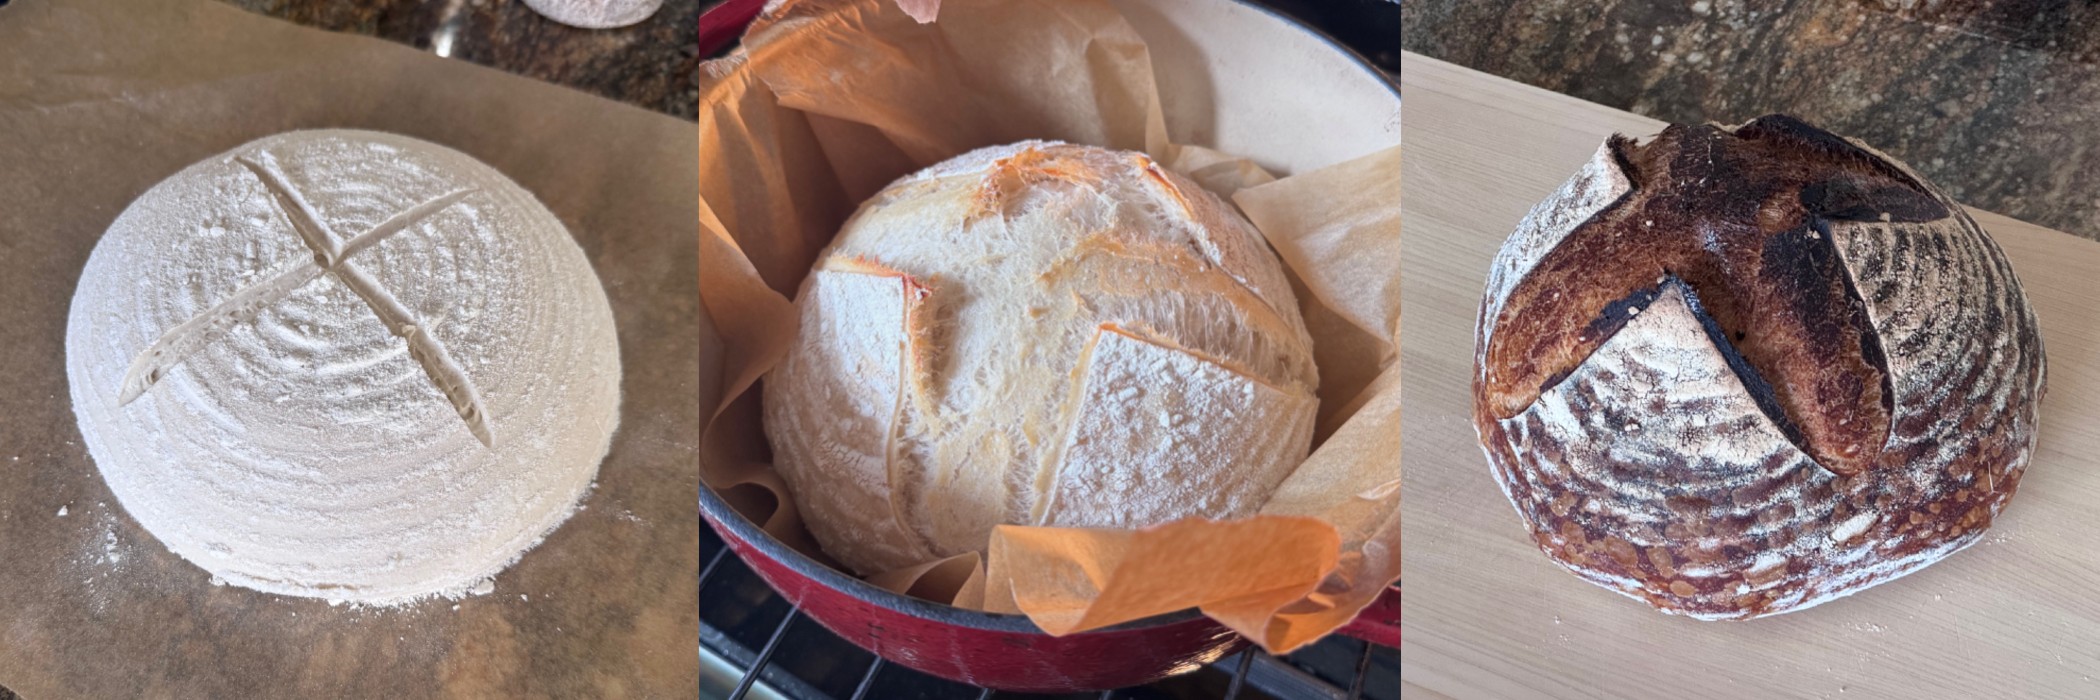
Dust a proofing basket with flour4 and transfer the dough to it, seam side up. (If you do not have a proofing basket, you can put a dry kitchen towel, dusted liberally with flour, in a large bowl.)
Dust with flour, cover with towel, and place in fridge overnight.
flexible wait
(8-16 hours)
part 3
(1 hour, 20 minutes total)
1 minute of work
Preheat oven to 475°F (245°C). Put in a dutch oven, with lid, to preheat with the oven.
When preheated, wait a little extra time to ensure the oven and dutch oven are heated throughout.
30 minutes later
5 minutes of work
Remove loaf from fridge, score it, and place into the dutch oven using your preferred technique.5
Optionally, spritz with water to encourage a bubbly, golden crust.
Place into oven and lower temperature to 425°F (220°C).
25 minutes later
1 minute of work
Take the lid off the dutch oven to allow the loaf to brown.
The remaining baking time is to your preference. The longer you leave it, the darker, thicker, crispier and more bitter (in a good way!) the crust will become. It’s almost impossible to overcook the inside, but it is possible to burn the bottom, so place an empty baking sheet on a rack just below the dutch oven if you plan to go longer than 30 minutes on this step. (I have gone 60 minutes on this step before.)
25 minutes later
1 minute of work
Take the bread out of the oven and place on a wire rack.
Let cool completely before slicing. The inside is still cooking! (Yeah, it’s difficult.)
-
All-purpose flour does work, it’s just less forgiving and the texture is slightly different (but still good!). Bread flour is just high-protein flour, usually about 13%. Some flours state the protein percentage on their package; others mention it on their site. King Arthur’s bread flour is 12.7%. Trader Joe’s all purpose was, in 2014, 11.8%. ↩
-
Don’t forget to save some to feed it again! ↩
-
If you don’t have a stone countertop, you can use a baking sheet, though they tend to slide around a lot. You can flour a wooden surface if you really want, but the non-porous surface really does make a big difference. ↩
-
I use a 50/50 mix of all-purpose and rice flours, and the loaf pops right out of the basket. Amazing! ↩
-
The standard is to place it on a large piece of parchment paper on a cutting board, score it, and lift it by the paper into the dutch oven. If the scoring is simple, you can also just drop the proofing basket right into the dutch oven and palm it back out, but make sure that you drop it forcefully and without hesitation to encourage a clean separation of the dough. If you used the kitchen-towel-in-bowl technique, I would very much not recommend trying to aim the loaf right into the dutch oven. ↩